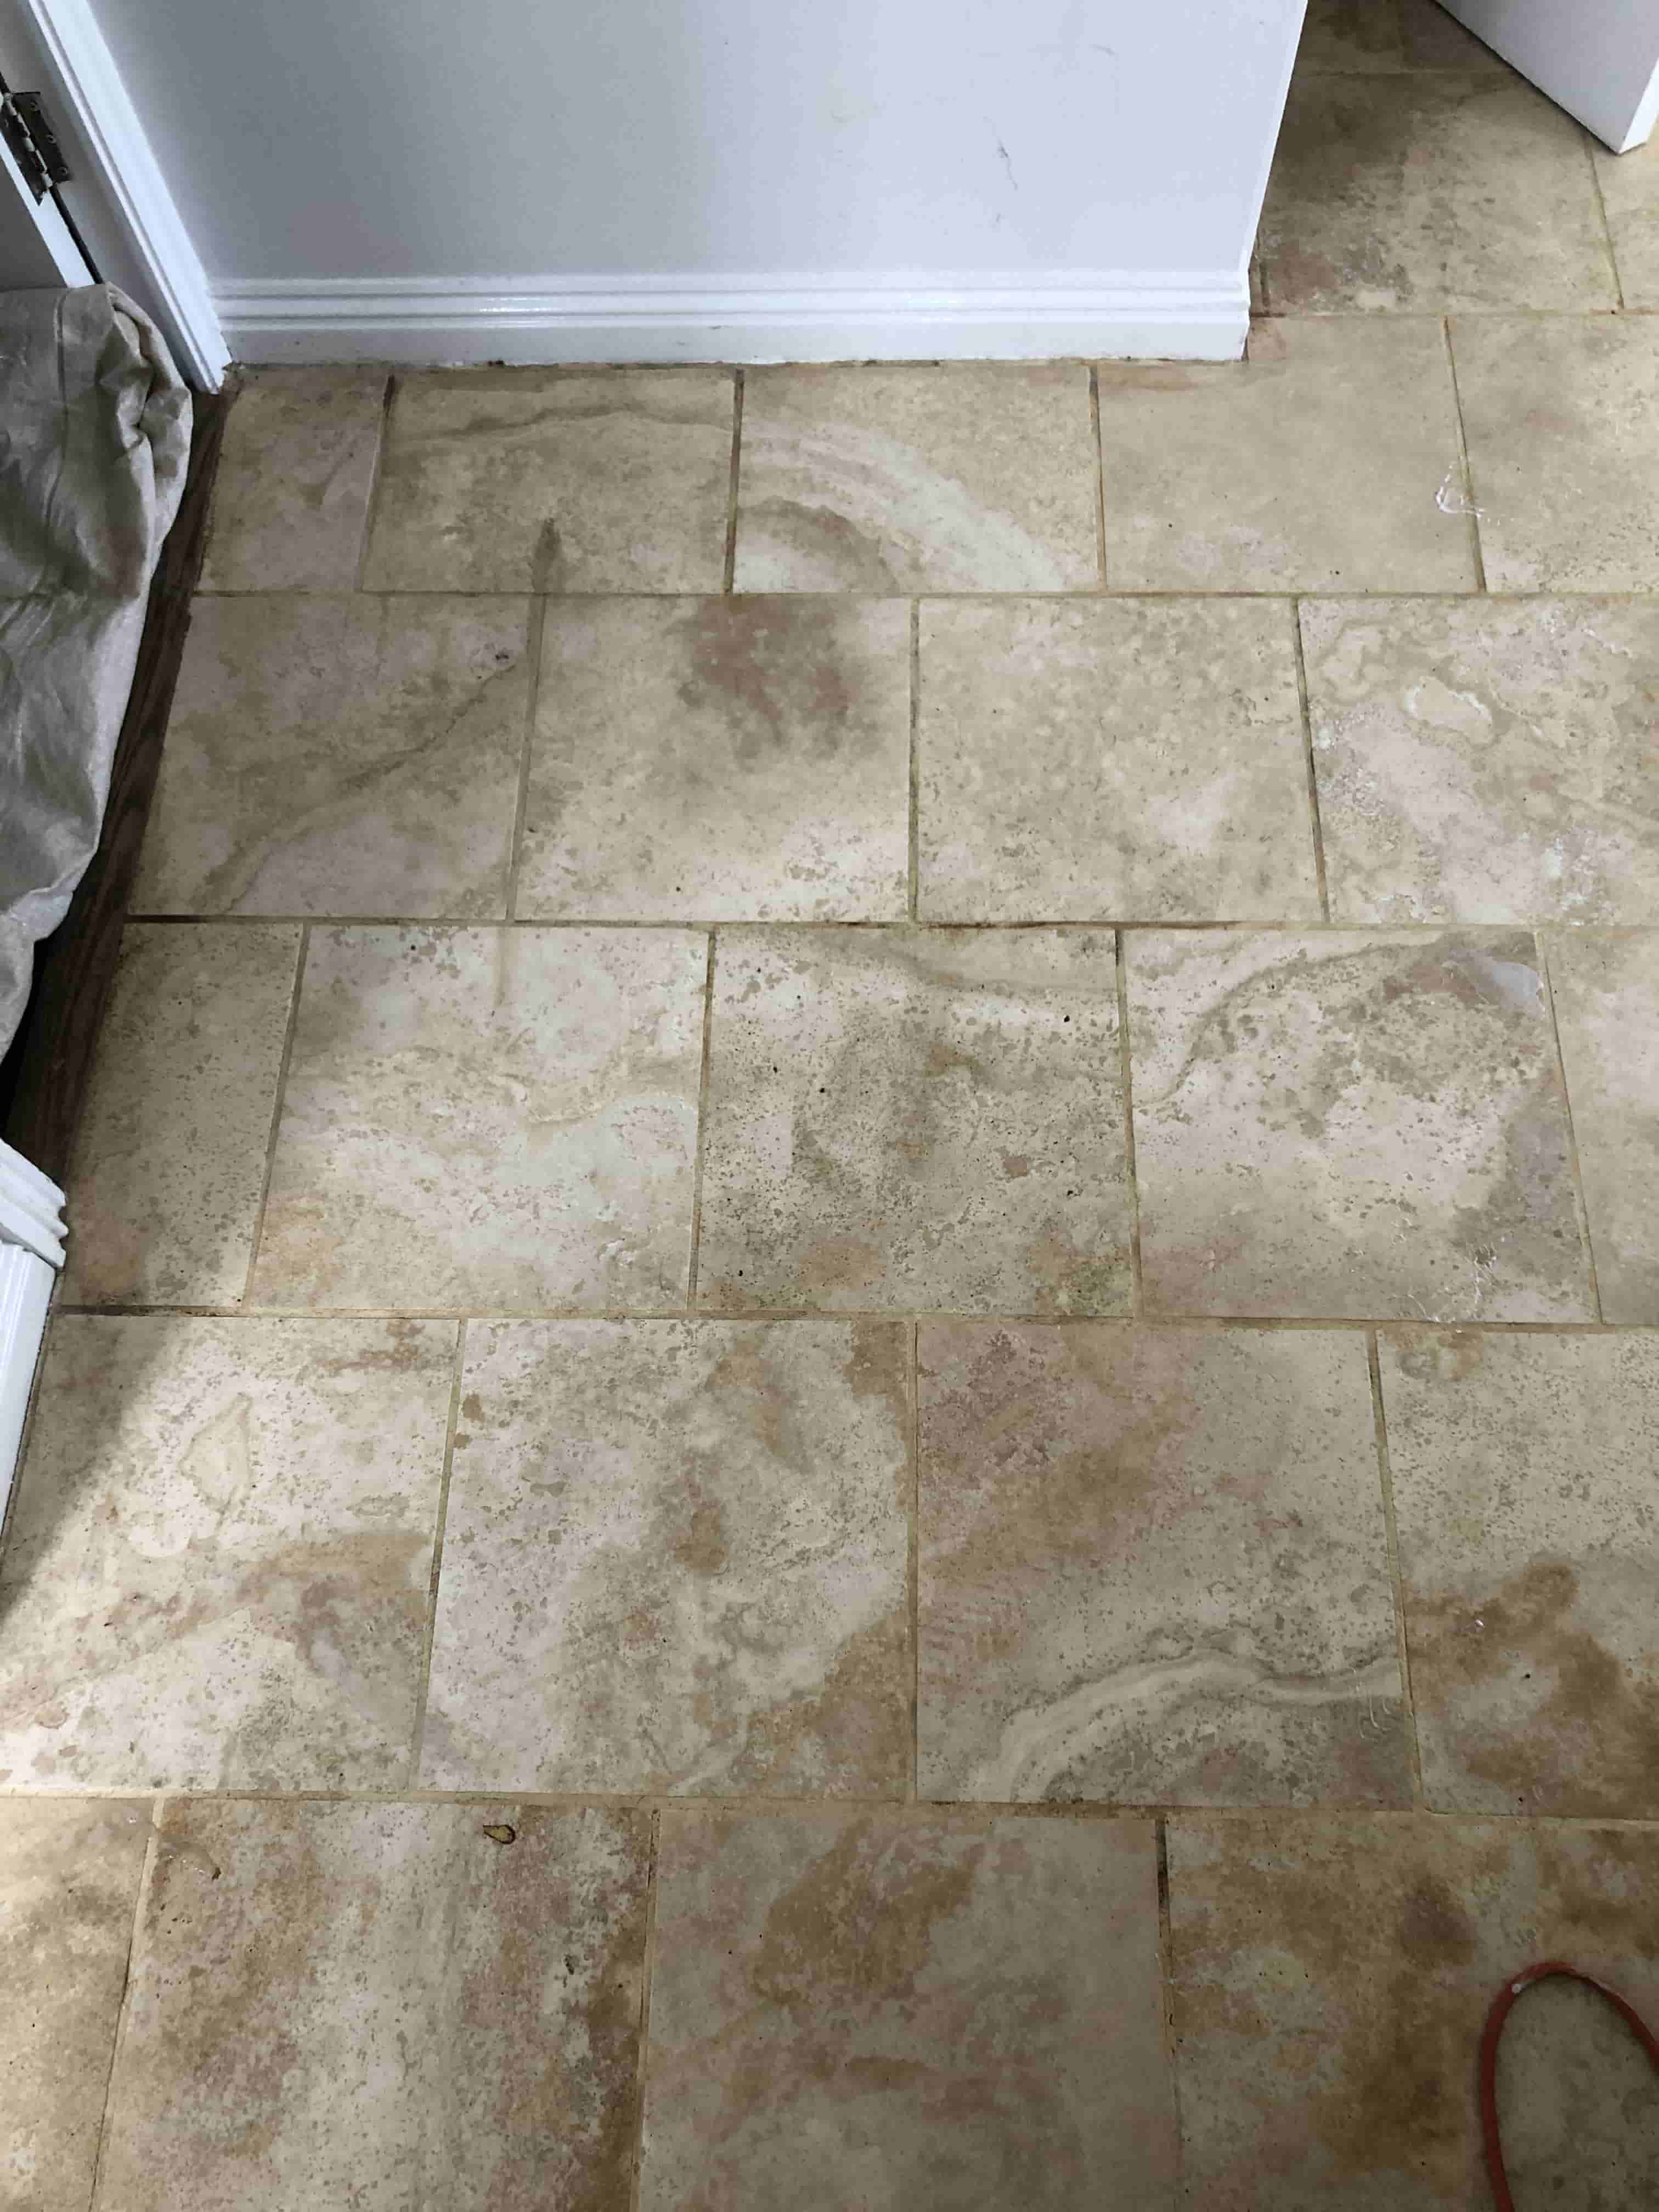
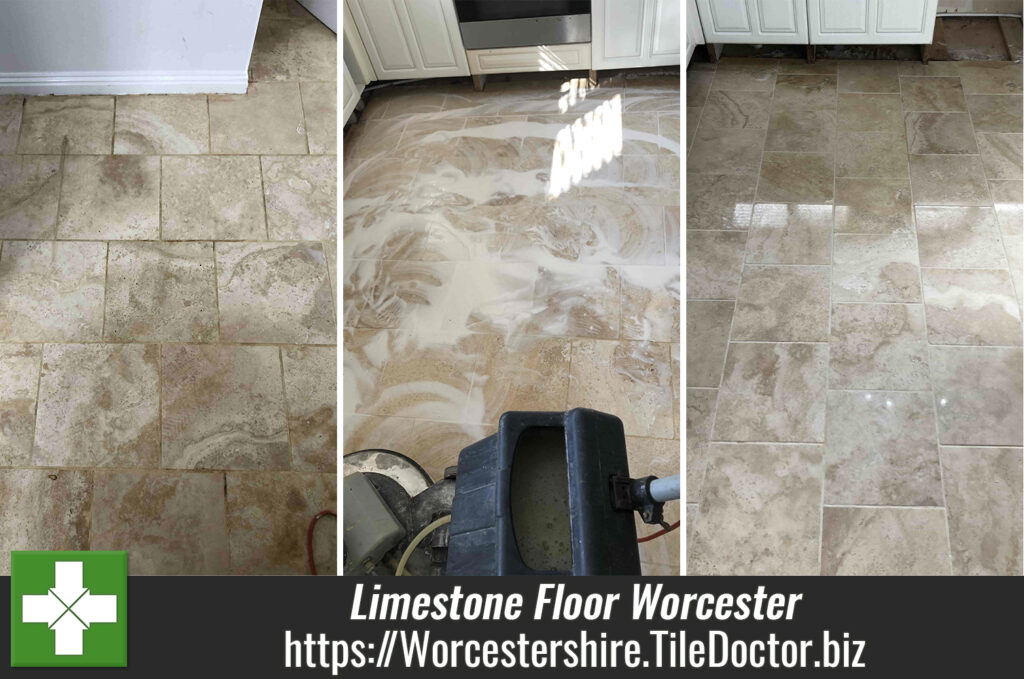
This client from Worcester contacted us about their Limestone tiled floor that was installed in their kitchen and utility room. The couple had only recently moved into the property and had wanted something done about the tile and grout which was looking worse for wear and thoroughly neglected by the previous owner.

I’m based in Worcester, so it wasn’t long before I was able to visit the property and survey the floor and create a quote for renovating it. Hopefully you can see from the photos that the grout had darkened in places and the Limestone tiles looked dull and grubby. The problem with natural stone floors like this is over the years the protective sealer becomes worn down leaving it vulnerable to ingrained dirt. Without a sealer to protect the stone it had become heavily soiled and loses its original polished appearance.

The quote (which was accepted) included deep cleaning the stone and grout to remove deep seated dirt and then to polish and seal the Limestone to protect it.
Deep Cleaning a Neglected Limestone Tiled Kitchen Floor
To bring the Limestone tile back to life my first step was to run a coarse 400-grit burnishing pad, fitted to a weighted Italian Hypergrinder rotary machine, over the floor using a dilution of Tile Doctor Stone Soap to help with the cleaning and provide lubrication. The 400-grit pad deep cleans the stone and can remove light scratches, old sealers and etching caused by the use of acidic cleaning products such as bleach.

After rinsing the floor with water and then extracting the soil with a wet vacuum I moved onto the 800-grit Burnishing Pad which is the first step in rebuilding the polished appearance on the Limestone. The process is the same as the 400-grit pad and after another rinse and extraction it was repeated using the 1500-grit pad all of which further build on the polished appearance of the stone.
Deep Cleaning Grout on a Limestone Tiled Kitchen Floor
The cleaning and burnishing took up much of the first day however floor pads do struggle to reach into the recesses of the grout lines so before leaving I turned by attention to the grout. For this I made up a strong dilution of Tile Doctor Pro-Clean and applied to the grout lines where it was left to soak in for ten minutes. Then I hand scrubbed the grout using a grout brush. Once done the soil was rinsed off the floor as before and extracted using the wet vacuum. The floor was dried as much as possible using the wet vacuum and then allowed it to dry off fully overnight.
Polishing and Sealing a Limestone Tiled Ground Floor
The following day the final 3000-grit pad in the four-pad set was applied to the floor to bring up the polish even further. The pad is applied dry with only a little water sprayed onto the tile. We call this process a “Spray Burnish” and as well as leaving the floor nice and dry ready for sealing it adds a nice subtle shine to the stone.
To seal the Limestone and further enhance the shine on the Limestone I applied Tile Doctor Shine Powder which is a crystalised powder that is worked into the stone with a White buffing pad running at a slow speed. The crystals add a tough durable deep shine to the stone that provide protection from ingrained dirt.

Once done the floor looked transformed once complete and before leaving, I left a bottle of Tile Doctor Stone Soap with the client and gave them some information about how best to maintain the floor. This product is pH neutral and cleans whilst maintaining the patina on the stone helping to keep the floor in great condition.


If you’re selling your property and want to achieve the best price then it makes sense to ask Tile Doctor to pop round and renovate grubby tiled floors or bathroom grout.